
 ChatGPT
 Perplexity
 Claude
 Grok
GrokIf you're building a blog section for a Next.js app, you need a reliable way to fetch blog posts via API and render them without slowing down your site. Whether you're pulling content from a headless CMS or a custom backend, the process involves the same core steps: setting up an endpoint, writing a fetch function, and rendering the response in a component.
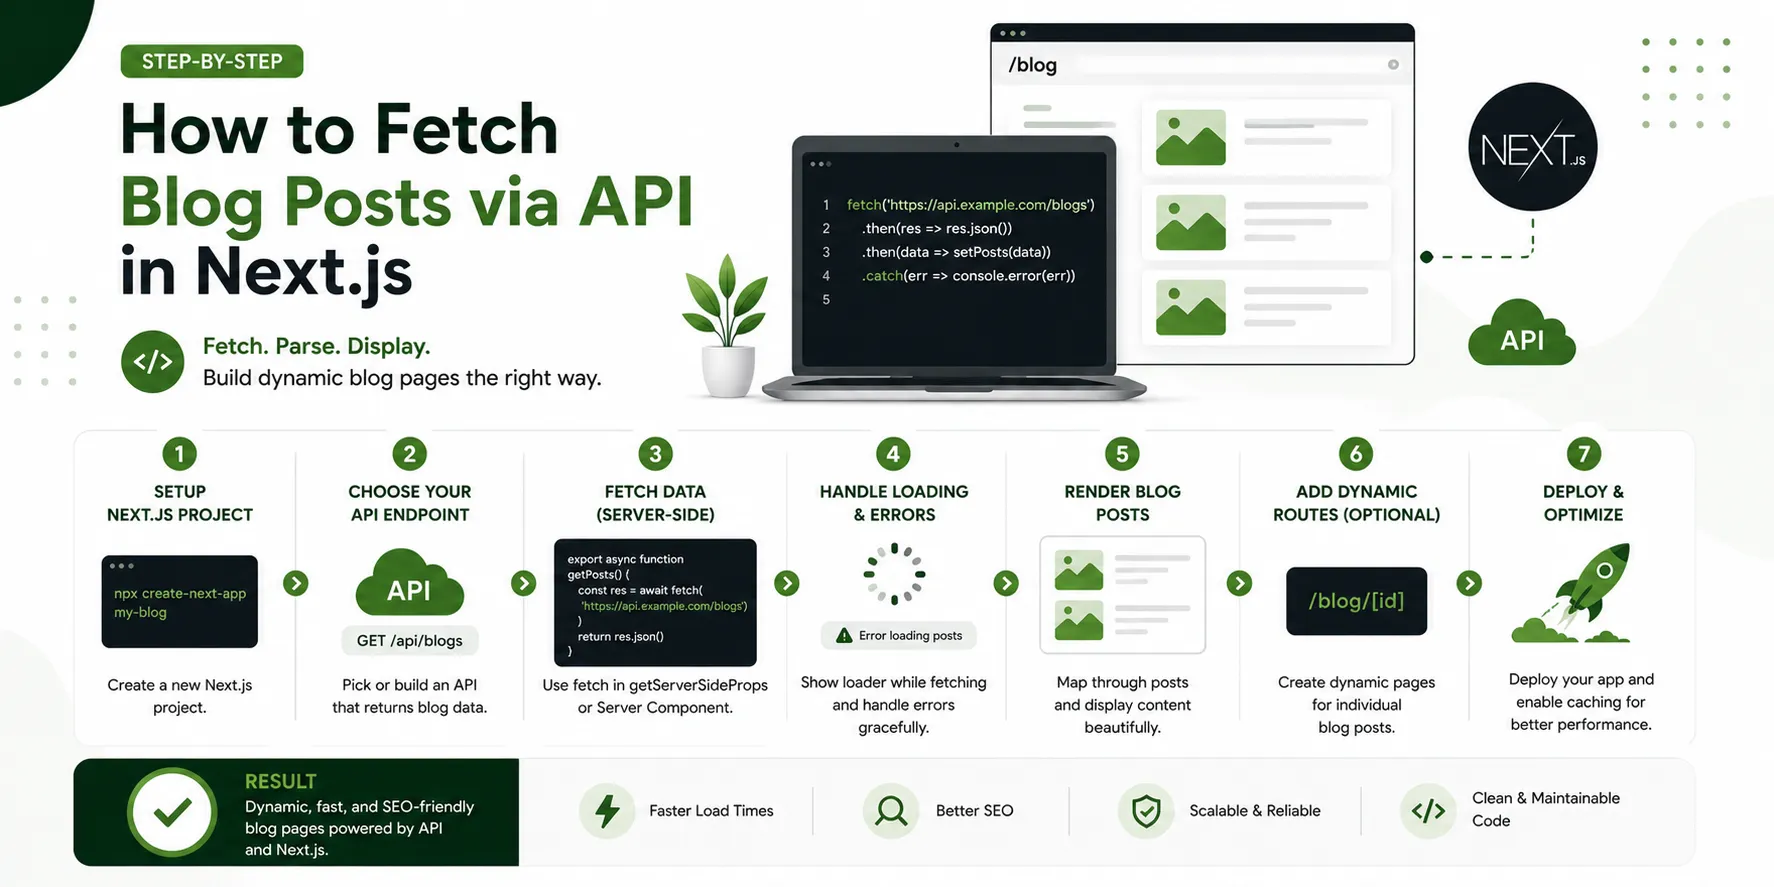
This guide walks through how to fetch blog posts via API in Next.js, from project setup to pagination and caching. We'll use ContioReach as the content source throughout the examples, since its API structure reflects what most modern headless CMS platforms look like, though the same pattern applies wherever your content lives.
Why Fetch Blog Posts via API Instead of Hardcoding Content
Hardcoding blog content directly into your Next.js pages works fine for a handful of static pages, but it breaks down fast once you're publishing regularly. Every new post would require a code change and redeploy just to go live.
Fetching blog posts through an API solves this by separating your content from your codebase. Your writers or marketing team can publish posts through a CMS, and your Next.js frontend simply requests and displays whatever content exists at request time or build time. This is the entire premise behind headless CMS architecture, and it's why so many teams pair Next.js with a platform like ContioReach for content management.
Prerequisites
Before you start, make sure you have:
A Next.js project (version 13 or later, using the App Router)
Node.js installed locally
An active ContioReach account with an API key
Basic familiarity with JavaScript async functions
If you don't already have a Next.js project running, you can create one with a single command:
npx create-next-app@latest my-blog
cd my-blog
Step 1: Get Your API Endpoint and Key
Every request to fetch blog posts via API needs two things: an endpoint URL and an authentication key. In ContioReach, both are available from your dashboard under API settings. Your endpoint will typically look something like this:
https://api.contioreach.com/v1/posts
Store your API key in an environment variable rather than hardcoding it into your files. Create a .env.local file in your project root:
CONTIOREACH_API_KEY=your_api_key_here
CONTIOREACH_API_URL=https://api.contioreach.com/v1/posts
Keeping these values in environment variables means you can swap keys between development and production without touching your code.
Step 2: Create a Reusable Fetch Function
Rather than writing a fetch call inside every component that needs blog data, create a single reusable function. This keeps your code cleaner and makes it easier to update later if the API changes.
Create a file at lib/getPosts.js:
export async function getPosts() {

  const res = await fetch(process.env.CONTIOREACH_API_URL, {

    headers: {

      Authorization: Bearer ${process.env.CONTIOREACH_API_KEY},

    },

    next: { revalidate: 3600 },

  });


  if (!res.ok) {

    throw new Error(Failed to fetch posts: ${res.status});

  }


  const data = await res.json();

  return data.posts;

}
The next: { revalidate: 3600 } option tells Next.js to cache the response and refresh it every hour, which we'll cover in more detail later in this guide.
Step 3: Fetch Blog Posts in a Server Component
With the App Router, Server Components can call your fetch function directly, without needing getStaticProps or getServerSideProps. This is the cleanest way to fetch blog posts via API in a modern Next.js project.
Create or update app/blog/page.js:
import { getPosts } from '@/lib/getPosts';


export default async function BlogPage() {

  const posts = await getPosts();


  return (

    <main>

      <h1>Blog</h1>

      <ul>

        {posts.map((post) => (

          <li key={post.id}>

            <a href={/blog/${post.slug}}>{post.title}</a>

            <p>{post.excerpt}</p>

          </li>

        ))}

      </ul>

    </main>

  );

}
Because this is a Server Component, the fetch happens on the server during rendering. Visitors never see a loading spinner for this data, and search engines can crawl the fully rendered content right away.
Step 4: Fetch a Single Blog Post by Slug
Listing posts is only half the job. You also need a way to fetch and display an individual post when someone clicks through. Add a new function to lib/getPosts.js:
export async function getPostBySlug(slug) {

  const res = await fetch(${process.env.CONTIOREACH_API_URL}/${slug}, {

    headers: {

      Authorization: Bearer ${process.env.CONTIOREACH_API_KEY},

    },

    next: { revalidate: 3600 },

  });


  if (!res.ok) {

    throw new Error(Failed to fetch post: ${res.status});

  }


  return res.json();

}


Then create a dynamic route at app/blog/[slug]/page.js:

import { getPostBySlug } from '@/lib/getPosts';


export default async function PostPage({ params }) {

  const post = await getPostBySlug(params.slug);


  return (

    <article>

      <h1>{post.title}</h1>

      <p>{post.date}</p>

      <div dangerouslySetInnerHTML={{ __html: post.content }} />

    </article>

  );

}
This pattern lets each blog post render on its own URL, pulling fresh content straight from ContioReach without any manual updates on your end.
Step 5: Add Pagination for Larger Blogs
Once your blog grows past a couple dozen posts, loading everything on one page becomes slow and unnecessary. Most APIs, including ContioReach, support pagination through query parameters.
Update your fetch function to accept a page number:
export async function getPosts(page = 1, limit = 10) {

  const res = await fetch(

    ${process.env.CONTIOREACH_API_URL}?page=${page}&limit=${limit},

    {

      headers: {

        Authorization: Bearer ${process.env.CONTIOREACH_API_KEY},

      },

      next: { revalidate: 3600 },

    }

  );


  if (!res.ok) {

    throw new Error(Failed to fetch posts: ${res.status});

  }


  return res.json();

}
You can then read the page number from the URL's search params in your Server Component and pass it into getPosts, giving readers a simple way to browse older content without one long, slow-loading page.
Step 6: Choose the Right Revalidation Strategy
Deciding how often to refresh your blog data matters just as much as fetching it correctly. Next.js gives you a few different approaches, and picking the right one depends on how often your content changes.
Fetching Strategy | Best For | How It Works |
Static (no revalidate) | Content that rarely changes | Fetched once at build time, never updates until redeploy |
Incremental Static Regeneration (ISR) | Blogs updated regularly | Cached response refreshes automatically after a set interval |
Server-Side Rendering (SSR) | Content that must always be current | Fetched fresh on every single request |
Client-side fetching | Interactive or user-specific data | Fetched in the browser after the page loads |
For most blogs pulling posts from ContioReach, ISR strikes the best balance. It keeps pages fast by serving cached content, while still picking up new posts within the revalidation window you set, whether that's every few minutes or once a day.
Common Errors When Fetching Blog Posts via API
Even with clean code, API requests can fail for a handful of predictable reasons. Here's what to check when something breaks.
Error | Likely Cause | Fix |
401 Unauthorized | Missing or incorrect API key | Confirm your key is set correctly in .env.local |
404 Not Found | Wrong endpoint URL or invalid slug | Double check the API URL and slug spelling |
500 Internal Server Error | Issue on the CMS side | Retry the request, then check ContioReach status if it persists |
Empty posts array | No published content or wrong filters | Verify posts are published and query parameters are correct |
Stale content showing | Revalidate interval too long | Lower the revalidate value or trigger manual revalidation |
Handling Loading and Error States Gracefully
Server Components handle most of the heavy lifting, but you still want a fallback in case a fetch fails. Wrap your data-fetching logic in a try-catch block and render a friendly message instead of letting the page crash:
export default async function BlogPage() {

  let posts = [];


  try {

    posts = await getPosts();

  } catch (error) {

    return <p>We could not load blog posts right now. Please try again shortly.</p>;

  }


  return (

    <main>

      <h1>Blog</h1>

      <ul>

        {posts.map((post) => (

          <li key={post.id}>{post.title}</li>

        ))}

      </ul>

    </main>

  );

}
This small addition makes a real difference for user experience, especially if your API has an occasional hiccup during high traffic.
Why ContioReach Simplifies This Whole Process
Building the fetch logic above only works well if the API on the other end is well documented, consistent, and fast to respond. ContioReach was built with exactly this kind of developer workflow in mind. Its API returns clean, predictable JSON, supports pagination out of the box, and includes clear documentation with ready-to-use code samples for frameworks like Next.js.
Beyond the API itself, ContioReach gives content teams tools like Keyword Planner and SEO Score to plan and optimize posts before they're published, so what your Next.js frontend fetches is already structured for search visibility. For developers, this means less time reverse-engineering inconsistent API responses and more time shipping features.
Frequently Asked Questions
What is an example of fetching data from an API in Next.js? A common example is calling the native fetch function inside a Server Component, then rendering the returned data directly in JSX, as shown in the ContioReach blog example above.
What are the best practices for data fetching in Next.js? Best practices include fetching data on the server whenever possible, using environment variables for keys, setting an appropriate revalidation interval, and wrapping fetch calls in try-catch blocks to handle errors gracefully.
How does data fetching work in the Next.js App Router? The App Router lets Server Components call fetch directly during rendering, without needing getStaticProps or getServerSideProps, and gives you control over caching through the next option on each fetch call.
What's the simplest way to fetch data in Next.js? The simplest way is an async Server Component that calls fetch and awaits the response, since no extra data-fetching functions or client-side hooks are required.
How do I use the Fetch API in Next.js? The Fetch API works the same as it does in standard JavaScript, with the addition of Next.js specific options like next: { revalidate } to control how long a response is cached.
How does server-side data fetching work in Next.js? Server-side data fetching runs entirely on the server during rendering, so the API call and the resulting HTML are generated before the page reaches the browser.
How do I fetch a single blog post in Next.js? You fetch a single post by passing its slug into a dynamic route, then calling your API with that slug to return just the matching post, as shown in the getPostBySlug example above.
Can I fetch data from an API route inside Next.js? Yes. Next.js supports internal API routes under the app/api folder, which you can call from your components the same way you would call any external API endpoint.
Conclusion
Fetching blog posts via API in Next.js comes down to a few consistent steps: setting up your endpoint and key, writing a reusable fetch function, rendering the results in a Server Component, and choosing a revalidation strategy that matches how often your content changes. Once this pattern is in place, adding pagination, error handling, or individual post pages becomes straightforward.
Pairing this setup with a platform like ContioReach means your Next.js frontend is always pulling from a clean, well-documented API, so you can spend your time building features instead of debugging inconsistent responses.
Ready to Connect Your Next.js Blog to ContioReach?
If you're setting up a blog for a Next.js project, ContioReach gives you a developer-friendly API, clear documentation, and content tools that make publishing and fetching posts simple from day one. Explore the ContioReach API docs to get your key and start building today.
Written by

Team Contioreach
Creates expert content on SEO, AI search, content strategy, and automation to help businesses grow their online visibility.